- Wasp Stings & Real Talk: What RecFest UK 2025 Taught Me - July 16, 2025
- Candidate First Job Postings: Write for Humans First, Robots Second - June 25, 2025
- How to Remove All Bias From Your Job Descriptions in Canada - May 21, 2025
Do you have a solid job description workflow? An effective job description workflow can streamline your hiring process and ensure compliance. This is only more important for larger organizations, who may struggle to ensure consistency in their job descriptions.
So, here are 7 steps to help you create consistent, bias-free JDs (at scale). The screenshots from the steps below are from the job description software Ongig.
1. Start a central repository
The first step in creating a job description workflow is having a central place to store JDs within your organization.
If your JDs are stored in different places (e.g., a shared drive, employee laptops, an ATS, etc.) and in different formats (.docx, .xls, .pdf, HTML, etc.) — Ongig helps you set up a “bulk fetch” to load them into a central repository:
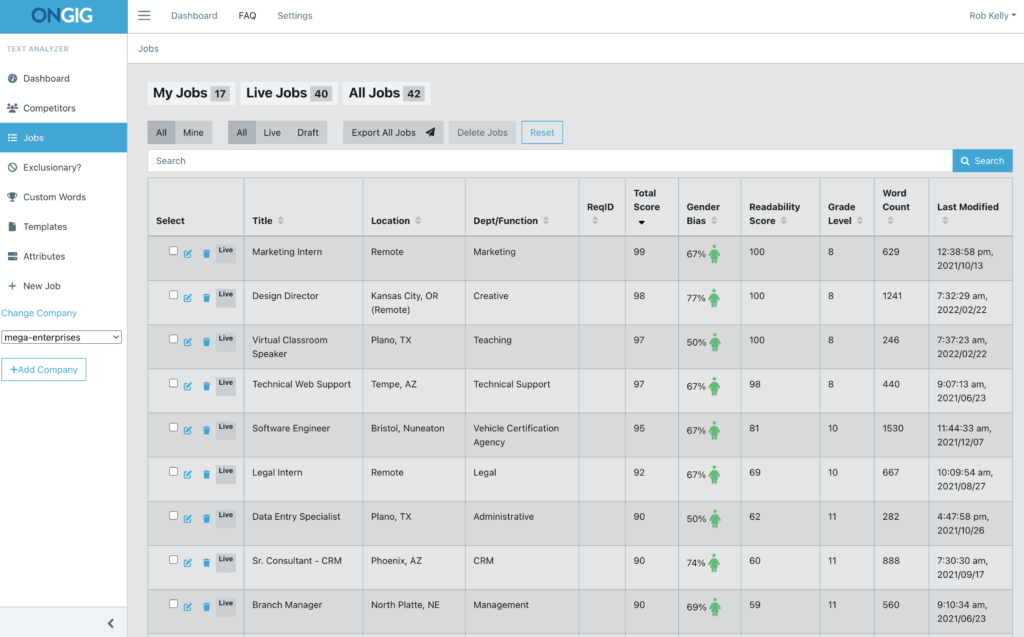
Or, you can also load them one-by-one by typing into a “new job” window, uploading a file, or using a custom template:

Because Ongig’s software is cloud-based, you can easily log in anywhere to access the JD library once it’s live. Any team member who has access to Ongig within your organization can pull from your library of job description templates, instead of creating more inconsistent versions.
If you don’t have job description workflow software like Ongig — keep all your JDs in an HR Shared Drive or in your ATS.
2. Set scoring goals (overall, diversity, readability) in your job description workflow
Creating a job description workflow also means setting goals for success. Ongig scores your job descriptions based on gender-neutrality and readability so you can make them more effective (and inclusive).
For example, if your goal is to hire more women, you can set a “gender-neutrality” goal to have a higher % of female-coded words in your job descriptions.
In addition, if your goal is to make your JDs easier to read, you might set your “readability” goal to an 8th or 9th-grade reading level. You can set an “overall” scoring goal too – this score evaluates all of your metrics together for easier analysis.
The “Success Metrics” are stored in Ongig for your reference. They can be coded into your job description manager, so your JDs aren’t “exportable” unless they meet all of your scoring goals for inclusivity or gender-neutrality:
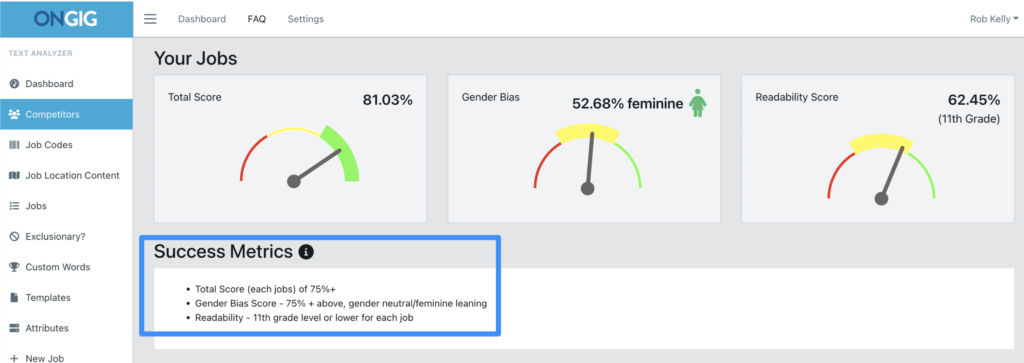
If you don’t use Ongig for setting success metrics, at least try to document your goals in Google Docs (or a similar tool) so you can revisit them later. So, don’t forget to check in with your goals for accessibility and inclusivity. Goals are far less useful without accountability.
3. Review scores regularly (by department, location, or team member)
After you create a central repository of JDs and set scoring goals, step 3 in your JD workflow is to review the scores.
In Ongig, your job description scores are sorted by:
- location (city, state, country)
- department/function (Accounting, Engineering, etc.)
- recruiter/hiring manager (the writer assigned to edit the JDs)
- the creator (the person who added the JD to Ongig)
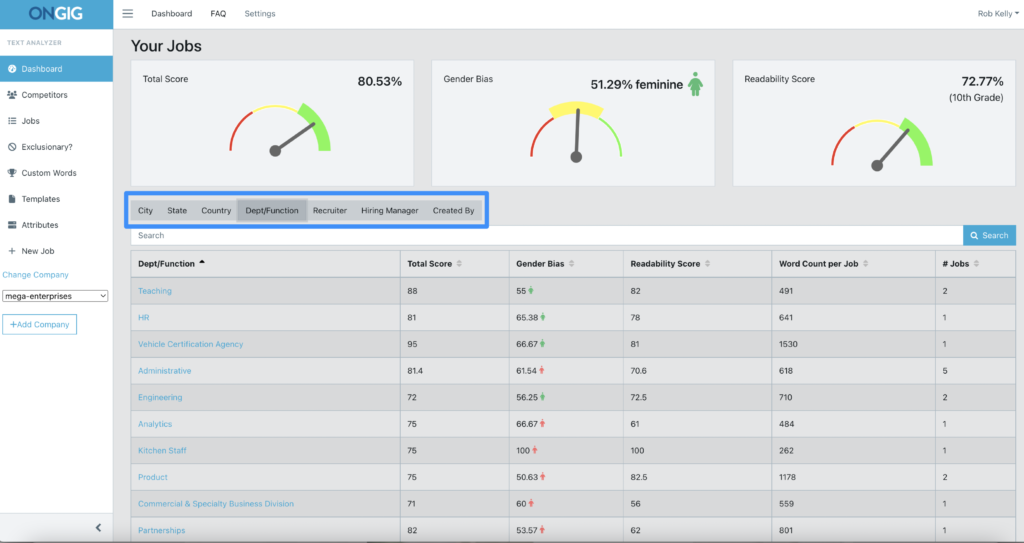
Reviewing your scores regularly helps you pinpoint any areas for improvement.
For example, if the “Analytics” JDs are 67% masculine (meaning there are more male-coded words than female-coded words), you might spend more time editing those. This is especially true if your goal is to hire more women.
The scoring dashboard also shows you which JDs need few to no edits (e.g., your JDs are gender-neutral with good readability scores).
If you don’t use Ongig’s scoring dashboard, you can use your ATS reporting to find which JDs are getting the most applicants vs. those that aren’t. This way, you know which ones you might want to make changes to first.
4. Create consistent templates for your Job Description Workflow
The next job description workflow step is optional. But also helpful, especially if you are writing and posting JDs at a greater scale. You can create custom templates in Ongig, so your content is consistent across departments. It’s easy to integrate customizable templates into your JD workflow:
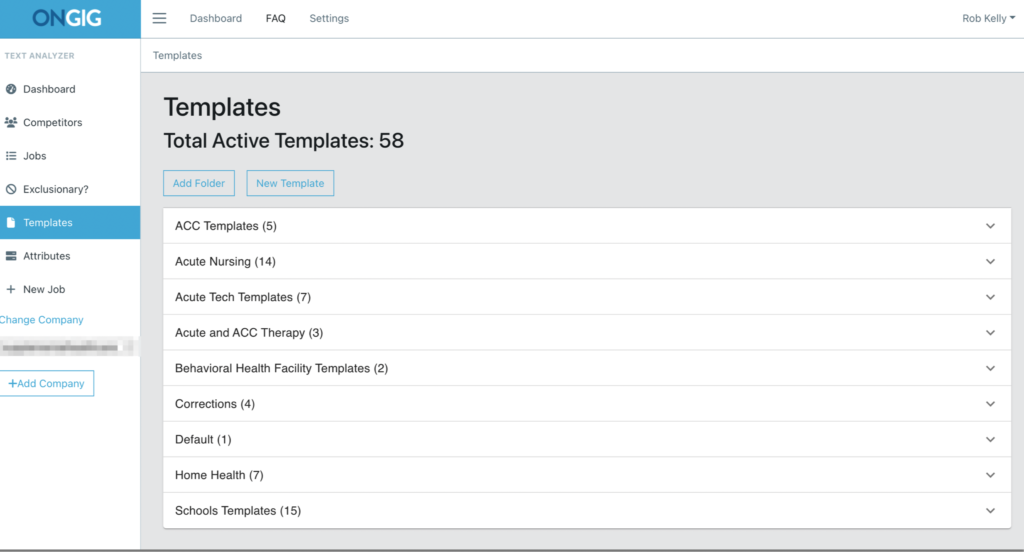
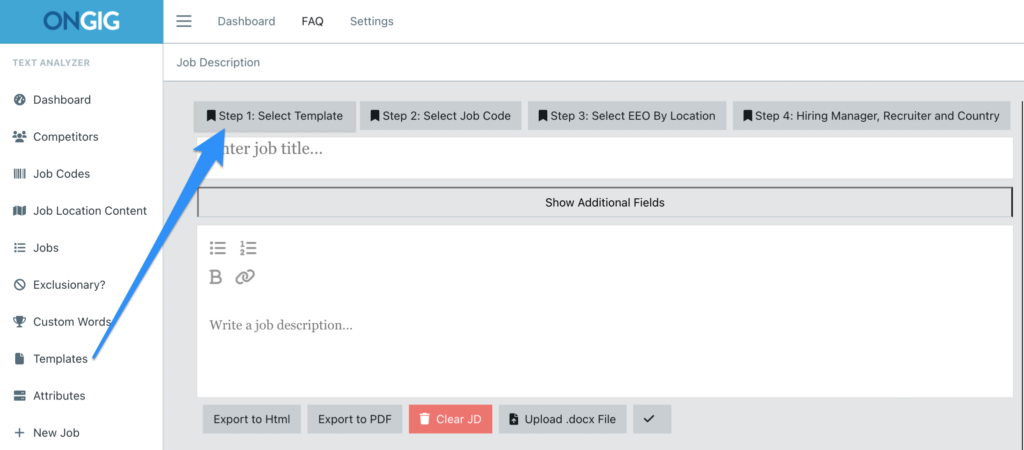
Ongig allows you to choose which blocks of text you want to make editable and which blocks you want “locked.”
For example, you might have standard compliance or DEI language you want to include across jobs, with no changes allowed. Or “Skills & Abilities” sections might vary by location or salary band.
All JD templates in Ongig are scanned for bias (gender, race, age, disability, etc.) and readability!
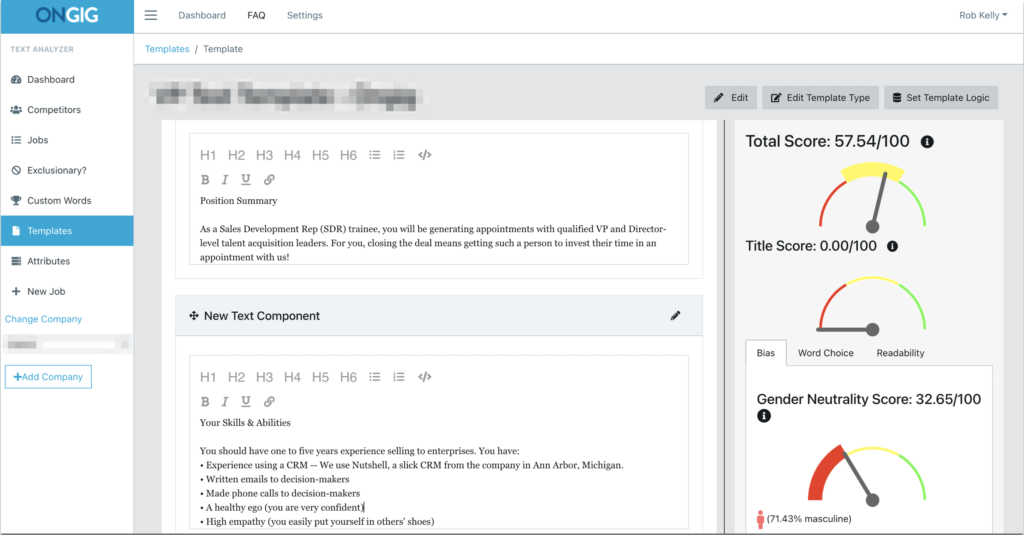
If you like to store your JD templates in a shared drive, instead of JD management software like Ongig, here are 4 Free Job Description Templates for Word you might like.
5. Use AI to manage your job description workflow
Managing multiple job description templates and tracking various users’ edits can be complicated. So, use AI tools to keep job descriptions organized across your organization. AI-powered productivity tools can track edits, summarize changes, and analyze team member productivity. Similarly, AI-powered applicant tracking systems (ATSs) can evaluate and summarize how different job descriptions perform with candidates.
Ongig also offers AI tools to simplify your workflow. You can use it to:
- Lock in certain sections of your job description template, such as a diversity statement
- Ensure consistency across your organization with effective job description templates
- Automatically review job descriptions for bias and suggest improvements
- Analyze job descriptions for SEO and readability
- And more
6. Assign user roles for faster job description workflow
Depending on your company size, your job description workflow will include different types of “users.” The most common user types are JD editors, reviewers, and approvers.
JD editors are often Recruiters or Hiring Managers. Reviewers and approvers might be Heads of Talent Acquisition, Compensation Managers, or Heads of D&I.
In Ongig, you can add unlimited users and assign permissions based on their role in the JD writing process. Some Ongig customers have only a few users. Others have thousands in their JD workflow:
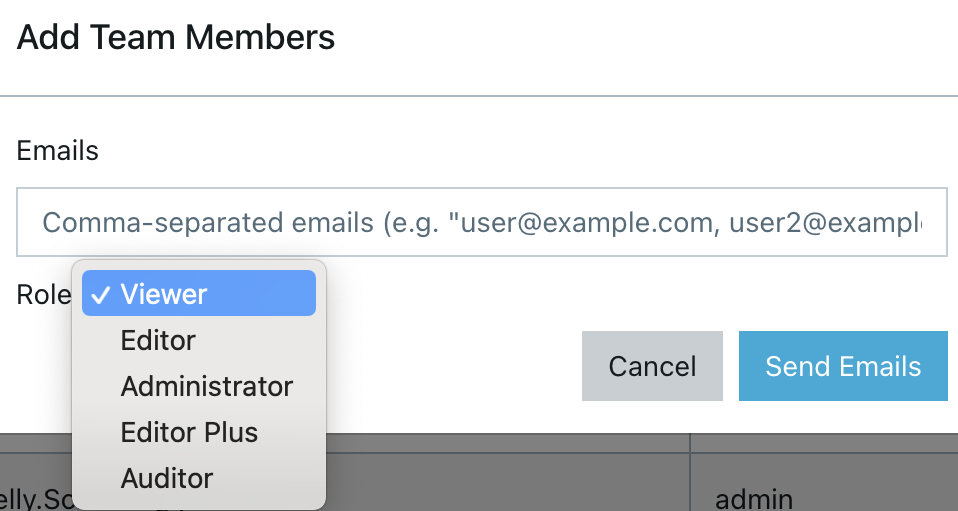
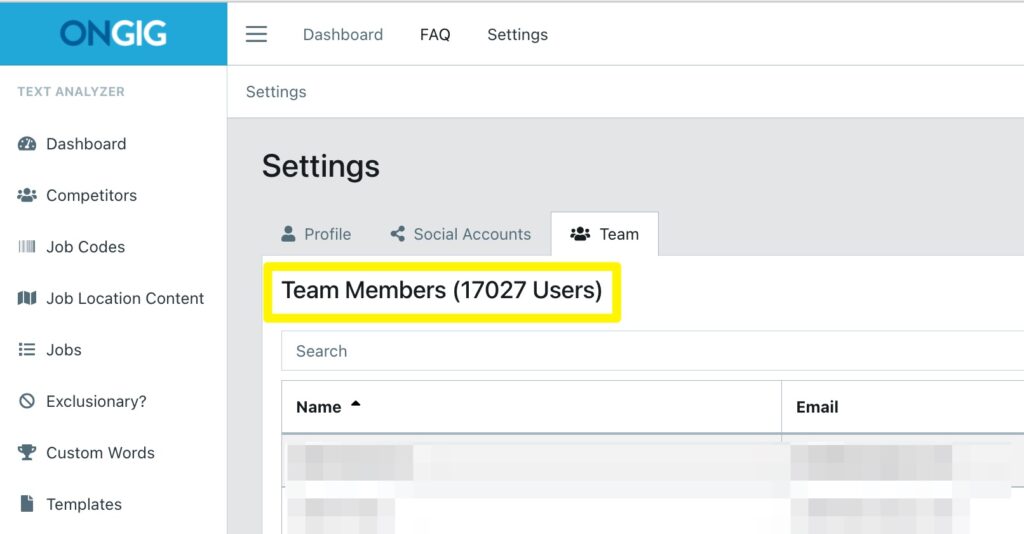
Here are some common JD workflow scenarios to help you decide which users you might have in Ongig: Who Should Write Job Descriptions? [5 examples]. Or, you can use them for inspiration in creating a job description workflow using your ATS or HRIS.
7. Edit your job descriptions
After creating a central repository, setting goals and reviewing JD scores, creating templates, and assigning users — it’s time to edit your JDs. This is an essential step in your job description workflow.
Ongig helps you edit job descriptions to be more inclusive and effective in your talent search. Each JD is scanned for:
- gender neutrality (the % of male- and female-coded words)
- “other” types of biased language (based on race, age, sexual orientation, etc.)
- complex language (legalese like “in order to” and “in accordance with”)
- long lists of requirements (that might deter women or neurodiverse candidates)
- job title traffic (suggestions for more SEO-friendly job titles)
- extra long sentences (that negatively affect readability)
- missing sections candidates search for (e.g., salary, benefits, and DEI statements)
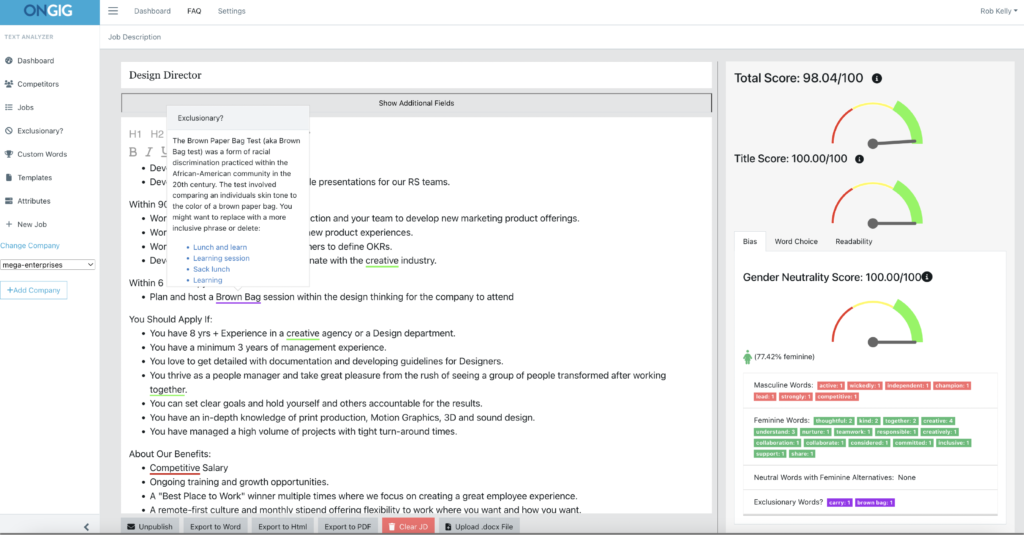
Plus, tips and best practices are built into Ongig so you can edit (and improve) your JDs with just a few clicks. The scoring updates in real-time as you make edits so you can keep track of progress.
Outside of Ongig, there are other free resources for help editing job descriptions (e.g., Gender Decoder or bias-free language guides).
8. Check job descriptions for compliance
Compliance may be easy to overlook, but it’s one of the most important aspects of hiring. Any good job description workflow must include a step where you and your team check your job descriptions for compliance.
Thankfully, using a job description manager like Ongig makes checking for compliance easier. By using tools like our Text Analyzer, which checks job descriptions for language that is biased against women, people of color, disabled people, and other groups vulnerable to discrimination. Still, even if you use a bias checker for job descriptions, you’ll need a separate review for compliance. So, look for any language that discriminates against protected groups.
You’ll want to consult with your internal counsel (attorney) to ensure compliance because jurisdictions have different requirements for employers during hiring. Here are some of the possible compliance requirements you could need to consider, depending on where you’re hiring:
- Criminal history: Some localities protect people with prior criminal convictions from discrimination during the hiring process. In some of these areas, employers may only perform a background check after a job offer is made.
- Salary transparency: Some localities require that employers post a salary range in the job description.
9. Export your jobs (or sync with your ATS)
The last step in your job description workflow is exporting your optimized JDs and publishing them to your career site.
Ongig gives you options on which format to use. You can:
- Export to Word, Excel, or PDF if you want to keep a clean copy of your JDs.
- Export to HTML to keep the formatting and easily copy/paste to your career site.
- Sync directly to your ATS or HRIS through API integration (in real-time or a set # of times per day).
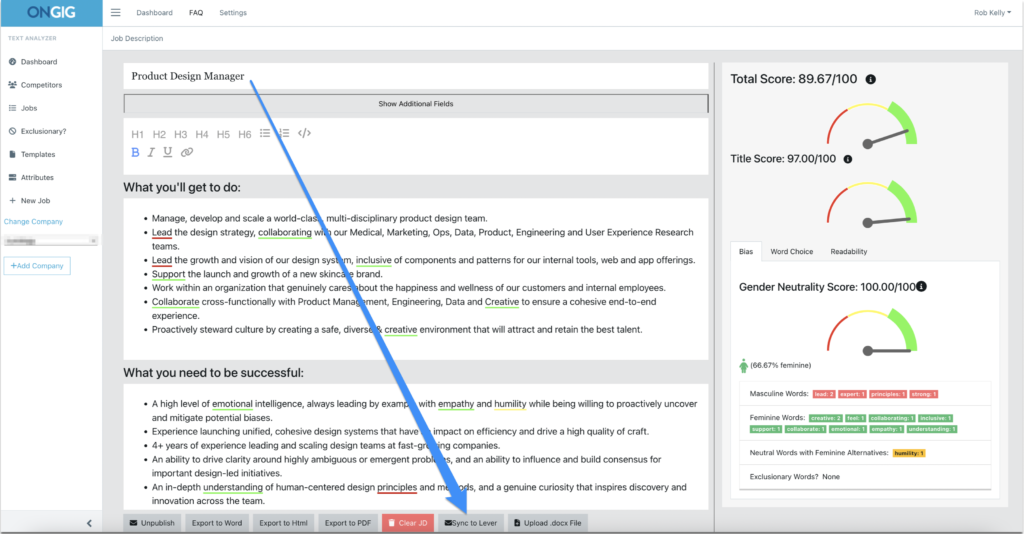
If you don’t use Ongig to export/sync your approved JDs, you can copy/paste, make edits, and publish them inside your ATS.
The Value of Regular Review and Updates
Regularly reviewing and updating job descriptions is essential. Job roles and responsibilities can change over time. Therefore, by keeping job descriptions current, you ensure they accurately reflect what the role entails. So, this helps both production teams and job seekers understand the essential functions of the job.
It’s a good idea to have a workflow coordinator or a process analyst to oversee this. They can help make sure updates happen in a timely manner. This way, production managers and the hiring team can stay aligned with current business needs.
Adapting to Industry Trends
Another crucial element is staying up-to-date with industry trends. So, this means adjusting job profiles and descriptions to reflect the latest in the field. For example, if a workflow specialist role is becoming more prominent in your industry, make sure to include it.
This adaptability shows job seekers that your company is modern and forward-thinking. It also helps your team manager attract top talent. So, high volume hiring can be made easier when job posts resonate with what candidates are looking for.
Ensuring Inclusivity and Accessibility
Creating inclusive and accessible job descriptions help attract a diverse pool of candidates. So, use gender-neutral language and avoid jargon that might confuse applicants.
Consider the different needs of job seekers. For instance, highlight if the role allows for flexible work arrangements. This can include the workflow manager and operations coordinator roles. So, clear and inclusive descriptions lead to better client satisfaction and a good time for everyone involved.
Training and Development for Hiring Managers
Training hiring managers on how to create effective job descriptions is key. You can use workshops or seminars on using excellent communication and problem-solving to upskill them.
Providing training ensures that job descriptions are clear and accurate. It also helps the hiring team understand the importance of confidentiality and how to handle personal information. Therefore, investing in this training can improve the overall process and lead to better hiring outcomes.
Similarly, having a bachelor’s degree or equivalent experience in HR or business processes can be beneficial for those in a workflow coordinator role. This training helps in handling high volume hiring and managing client expectations efficiently.
Why I wrote this:
Ongig’s mission is to create effective and inclusive job descriptions. Helping you build a solid job description workflow is part of this mission. Do you have a job description workflow? Creating a unified strategy for all your team members can ensure more consistent, compliant, and effective job descriptions. Ongig helps organizations across a variety of industries refine the hiring process and remove unconscious bias from job descriptions. Please request a demo to learn more about how you can create a cloud-based JD workflow, to save you time and help you attract diverse talent.
